
Equipment
You will need some basic equipment before you can preserve your old media. Listed below are the needed devices for each format. Regardless of what you are digitizing, a computer is required, and it is strongly recommended that you have at least two separate data storage solutions prepared to place copies of your newly preserved media. Redundancy is the key to data safety.
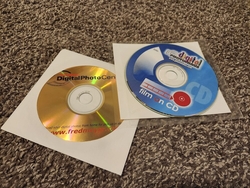
What you need for preserving discs
In addition to your computer and storage solutions, to back up discs you need the appropriate disc drive (see below) and, in the case of video, also need the MakeMKV software which can be installed from your operating system's software repository.
- CD drive --> Only for audio and photo CDs
- DVD drive --> Audio and photo CDs and DVDs
- BD drive --> Audio and photo CDs, DVDs, and Blu-ray discs
Don't worry if your drive has a "ROM" or "RW" code on it. The purpose of this process is to read discs, not write to them, so these codes will not matter.
If you have miniCDs or miniDVDs, the same rules apply for which drive you need to have. Just make sure the drive has a tray and is not slot-loading. In some cases, a specific camcorder is needed to read these discs. Feel free to inquire about this by emailing me. My email is listed at the bottom of this page.
If you have UHD discs to preserve, that will require a direct consult with me as it requires limited and specialized hardware and software. You can email me to ask about that.
Once your drive and applicable software are installed, you are ready to go. Instructions for preserving your discs can be found here.
What you need for preserving audiotapes
In addition to your computer and storage solutions, to digitize audiotapes you will need:
- a device to play them
- an aux cable
- an audio capture device (Many computers have one built in via a microphone jack)
- and the Audacity software which can be installed from your operating system's software repository
Your tape player will hook directly into your computer via the blue microphone jack. If your computer has a pink jack, don't use it as it will add noise to your recordings.
What you need for preserving videotapes
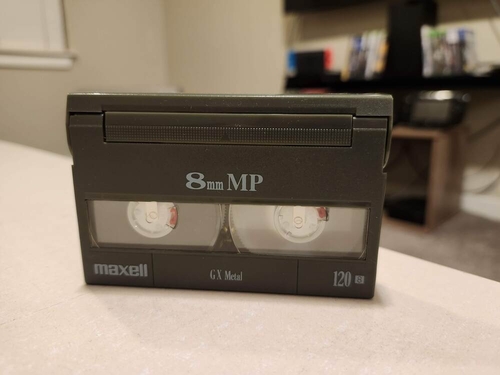
In addition to your computer and storage solutions, to digitize videotapes you will need:
- a device to play them (either a VCR or camcorder)
- an RCA to HDMI converter
- a video capture device
- and the VLC media player software which can be downloaded here or from your operating system's software repository. Many Linux installations come with VLC preinstalled.
- BONUS: if you want to be able to watch your tapes play back as you digitize them, you can also include an HDMI splitter in your setup. This takes one HDMI picture and sends it to two different displays. In our case these would be the capture device, and then a separate monitor or TV.
For VHS-C tapes, adapters do exist to fit them into VCRs if preferred.
RCA to HDMI adapters and video capture devices can be found for around $10 - $20 online or at local retailers.
When buying the capture device, be sure it is HDMI-in/USB-out, not the other way around. Or if you are investing in a more serious capture card for other ventures, that will do just fine as well.
If you want to go the extra mile and get an HDMI upscaler instead of an adapter, you can certainly do that! However, since the native resolutions of videotape formats are so low, this would likely do little to improve their quality.
If your tape player has S-video out, that would be better than RCA. In which case, finding an S-video to HDMI adapter would be ideal. If your tape player only has RF out, I would recommend finding a different player or reaching out to me for a consult.
Each device will hook into each other like so:
Tape player --> RCA/S-video to HDMI adapter --> HDMI splitter (optional) --> video capture device --> computer
If an HDMI splitter is being used, connect a cable from its second output port to a separate display for your viewing.
With your hardware and software ready to go, you are set to start digitizing some tapes! Instructions for that can be found here.
Process to preserve discs
Discs really are easy to preserve. It often doesn't amount to more than putting your disc in and hitting a button or two. Let's start with Audio CDs.
Audio and Photo CDs
- Insert the disc into your computer and access it
- Select everything on the disc and copy it to your chosen storage solution. I recommend placing files from each disc into their own respective folder.
- Rinse and repeat! See, I told you it was easy!
Don't forget to make a copy of your preserved files to another storage device for redundancy.
DVDs and Blu-rays
If the files on your DVDs or Blu-rays are stored just like you would on a flashdrive, then simply follow the instructions above for audio and photo CDs. If they are encoded to play in actual DVD or Blu-ray players, then follow these instructions:
- Open the MakeMKV software
- In the program preferences, change the minimum title length to less than what your shortest video would be.
- Insert the disc into your computer. MakeMKV will choose the correct drive if you have multiple installed. Give it time to load. NOTE: MakeMKV can only process one disc at a time.
- Once the disc information is populated, click on the disc drive image. The computer will take time to load more disc info.
- You will now be presented with how many "movies" are on your disc (usually 1, sometimes 2) and given the choice of where to put the output files. Make sure all movies are checked and your output is pointed to your chosen storage solution. Click the Make MKV button.
- MakeMKV will now make a viewable video file for each movie on your disc. This could take several minutes and even up to a half hour or more for blu-rays.
- Once the process is complete, go to where the output file should be. It will be called something like "A1_t00.mkv". If your disc had multiple movies, you will see additional files labeled "t01", t"02" and so on. You will definitely want to rename these to something that identifies what disc you just preserved.
- Congrats! Your disc has been preserved! At this point, you can eject the disc and MakeMKV will be ready for your next one.
NOTE: The .mkv files that are created from your discs don't often play on computers on their own. If this is the case for you, the VLC media player is an excellent program that plays .mkv files. That software can be downloaded here or installed from your operating system's software repository. Many Linux installations come with VLC preinstalled. If you would rather have your videos put into .mp4 format, you will need to convert them later.
Don't forget to make a copy of your preserved files to another storage device for redundancy.
Process to preserve audiotapes
Unlike discs, tapes actually need to be converted from an analog signal to a digital file. This is why we call it digitization. This process is not as quick as simply archiving CDs or DVDs, though, because in order to preserve a tape, you have to let it play back from start to finish. Here is how that process is done for audiotapes:
- Make sure your tape player is turned on and hooked into your computer as described above.
- On your computer, open Audacity. At the top of the window click the button that says "Audio Setup".
- From this drop down list set the host to ALSA.
- Set the playback device to your speakers or headphones.
- Set the recording device to Line In or your chosen audio capture device.
- Set the recording channels to stereo.
- Insert your tape and let it play. You should see the level meters next to the microphone at the top right of the window start to respond to your tape.
- You want these levels to be around -6 dB to -3 dB. This should put your meters into the yellow, but not red. Adjust the volume on your tape player to get these levels where you want them.
- Once these are set, rewind your tape, press the red record button in Audacity, then play back your tape.
- Let it play all the way through. Do not ever pause, fast-forward, or rewind the tape during playback as such behavior will be recorded in exactness in your digitized file.
- When the tape is complete (or you have recorded all that you want from it), press the brown stop button in Audacity.
- If you want, you can immediately edit your recorded file with the tools Audacity provides.
- When you are satisfied with your work, save your file to your chosen storage medium as a WAV file (for archival) or as an MP3 (for easy compatibility across devices).
- Great work! You are now ready for your next tape.
It is a good idea to have your tape rewound before starting your recording.
Don't forget to make a copy of your preserved files to another storage device for redundancy.
Process to preserve video tapes
This will be a very similar process to preserving audio tapes where you must let the tape play through all the way from start to finish. Here is that process:
- Make sure your tape player is turned on and hooked into your computer as described above.
- On your computer, open VLC media player. From the menu on the top of the window go to Media > Open Capture Device...
- Leave capture mode on "Video camera".
- For Video device name, select your capture card from the drop down menu, it will likely be something similar to "/dev/video0".
- Do the same for Audio device name, it will probably be listed as "hw:1,0" or something similar.
- Set the video standard to "NTSC" unless you are using another world region's standard.
- Now click on the arrow next to the Play button at the bottom of the screen and choose Convert from the drop down menu.
- You can check the box for "Display the output" if you want, however, depending on your hardware setup, you may not actually see the output of the tape on your screen. You will be able to get audio through your computer as it plays, though.
- It is recommended to check the box for "Deinterlace". This should improve quality for your digitized file.
- For the profile, choose "Video - H.264 + MP3 (MP4)" then click the wrench icon.
- Under the audio codec tab, make sure the codec is set to "MPEG 4 Audio ( AAC )". There is an option without the "( AAC )" so be careful. Depending on your setup, you may need to change the sample rate to 48000 Hz. In my experience, this has been the only sample rate that actually works for me. With your chosen settings in place, click save.
- For destination file, click browse and navigate to your chosen storage solution. Rename the file and click save.
- You are now ready to click start. This will begin a recording of exactly what your capture card is seeing.
- Insert your tape into the player and let it play for a bit. After the tape has played a section with some audio and video, stop the recording, find your recorded file and open it to make sure it recorded video and audio properly. If it hasn't you may need to adjust the settings for your capture device or sample rate in VLC.
- Once you know your settings are good, rewind your tape and start a new recording.
- Let your tape play all the way through. Do not ever pause, fast-forward, or rewind the tape during playback as such behavior will be recorded in exactness in your digitized file.
- When the tape is complete (or you have recorded all that you want from it), you can click the stop button in VLC media player. And that's it, your recording is done!
It is a good idea to have your tape rewound before starting your recording.
Since some tapes can last for up to six hours, it may be worth it to leave your setup running and come back to it later. If you find that you recorded for an extended time past the end of the tape, you can always edit the digitized file and cut the extra data on the end.
Don't forget to make a copy of your preserved files to another storage device for redundancy.